
Add Rapidflare to a WordPress site
To add Rapidflare to WordPress, install the free WPCode plugin and paste a short piece of code into it. Pick how the agent should appear, then follow that section. Each one has the code to copy and the steps that go with it.
What you need
- Permission to install plugins. On a site you host yourself, that is an Administrator account.
- On WordPress.com, a paid plan that allows plugins. Installing your first plugin activates the plan's hosting features and moves your address from
yourname.wordpress.comtoyourname.wpcomstaging.com. Add that address to your key too. The Free plan cannot add this code. - A publishable API key with your live domain on its allowed list. See What you need.
Step 1: Install WPCode (once)

- Go to Plugins → Add Plugin (Add New Plugin in older versions; on WordPress.com, open Plugins). Search for WPCode, then install and activate it.
- Open Code Snippets → Header & Footer. If you do not see it, look under Settings.
Every mode below pastes its code into the Footer box on this screen.
Step 2: Choose how the agent appears
| I want | Mode | Needs a spot on a page? | Jump to |
|---|---|---|---|
| A round chat button on every page | Floating Launcher | No | Chat button |
| My own button or link to open the agent | Inline Trigger | Yes, your button | Your own button |
| A search bar that opens the agent | Search Bar | Yes, a search bar box | Search bar |
| The agent shown inside a page, such as an Ask page | Full Page | Yes, an agent box | Agent on a page |
| A short AI answer on a page with a button to keep chatting | AI Overview | Yes, an overview box | AI Overview |
Not sure which to pick? See Which mode should I use?.
Replace YOUR_PUBLISHABLE_API_KEY in any code below with your publishable key.
Chat button
A round button in the corner of every page. It needs nothing on your pages.
- In Code Snippets → Header & Footer, paste this in the Footer box.
<script src="https://cloud.rapidflare.ai/storage/v1/object/public/rapidflare-embed-sdk/latest/agent.js"></script>
<script>
	window.rapidflare.init({
		apiKey: 'YOUR_PUBLISHABLE_API_KEY',
		display: { type: 'floating-launcher', position: 'bottom-right' }
	});
</script>
- Click Save Changes. Clear your cache if you use a caching plugin.
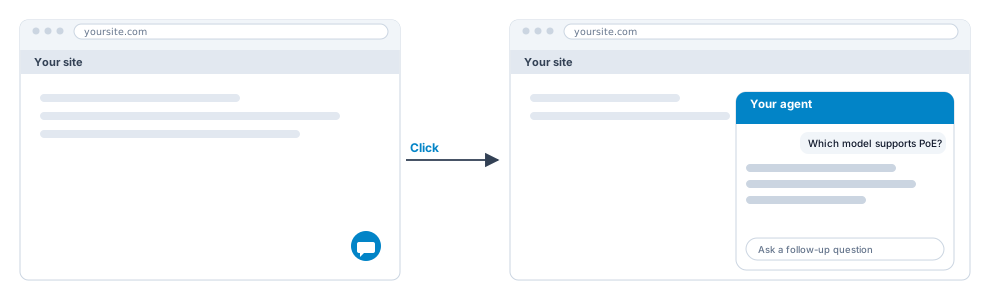
Deep dive: Floating Launcher and its display options.
Your own button
Your own button or link opens the agent in a panel that slides in from the side.
- Add the button. Edit the page, add a Buttons block, and type the label, for example
Ask AI. Open the block's Advanced section and putrapidflare-askin Additional CSS class(es). - Add the code. In Code Snippets → Header & Footer, paste this in the Footer box.
<script src="https://cloud.rapidflare.ai/storage/v1/object/public/rapidflare-embed-sdk/latest/agent.js"></script>
<script>
	// Starts only on pages that have the button
	if (document.querySelector('.rapidflare-ask')) {
		window.rapidflare.init({
			apiKey: 'YOUR_PUBLISHABLE_API_KEY',
			display: {
				type: 'inline-trigger',
				trigger: '.rapidflare-ask',
				variant: 'right-modal'
			}
		});
	}
</script>
- Click Save Changes, clear your cache, then open the page and click the button.
You can give the class rapidflare-ask to any other button or link, such as a menu item.
Deep dive: Inline Trigger, the panel variants and its display options.
Search bar
A search bar on a page. A visitor types a question, presses Enter, and the agent opens in a panel on the same page.
- Add the search bar box. Edit the page, or your theme's header area to show it on every page. Add a Custom HTML block where you want the bar and paste this.
<div id="rapidflare-search" style="display: flex; flex-direction: column;"></div>
- Add the code. In Code Snippets → Header & Footer, paste this in the Footer box.
<script src="https://cloud.rapidflare.ai/storage/v1/object/public/rapidflare-embed-sdk/latest/agent.js"></script>
<script>
	// Starts only on pages that have the search bar box
	if (document.querySelector('#rapidflare-search')) {
		window.rapidflare.init({
			apiKey: 'YOUR_PUBLISHABLE_API_KEY',
			display: {
				type: 'search',
				container: '#rapidflare-search',
				placeholder: 'Ask our AI assistant a question'
			}
		});
	}
</script>
- Click Save Changes, clear your cache, then type a question and press Enter.
Prefer to open a separate Ask page? Add the agent on a page first. Then in the code above, add this inside display, after placeholder, with your page's address:
action: { type: 'external-url', url: 'https://YOUR-SITE.com/ask', newTab: true }
Deep dive: Search Bar, on-page panel, opening a second page and its display options.
Agent on a page
The agent shown inside a page, for example an Ask page. This is also where a search bar or an AI Overview can send people.
- Add the page. Go to Pages → Add Page (Add New Page in older versions), name it
Askand publish it. - Add the agent box. On that page, add a Custom HTML block and paste this. Update the page.
<div id="rapidflare-agent" style="display: flex; flex-direction: column;"></div>
- Add the code. In Code Snippets → Header & Footer, paste this in the Footer box.
<script src="https://cloud.rapidflare.ai/storage/v1/object/public/rapidflare-embed-sdk/latest/agent.js"></script>
<script>
	// Starts only on pages that have the agent box
	if (document.querySelector('#rapidflare-agent')) {
		var params = new URLSearchParams(window.location.search);
		window.rapidflare.init({
			apiKey: 'YOUR_PUBLISHABLE_API_KEY',
			// Lets a search bar or AI Overview hand a question to this page
			prompt: (params.get('prompt') || '').slice(0, 1000) || undefined,
			autoSubmit: params.get('autoSubmit') === 'true',
			display: { type: 'full-page', container: '#rapidflare-agent' }
		});
	}
</script>
- Click Save Changes, clear your cache, then open the Ask page.
Deep dive: Full Page Widget, its box layout and Continue on a page you host.
AI Overview
A short AI answer on a page, with a button that continues the chat on your Ask page. Set up the agent on a page first.
- Add the overview box. Edit the page where the answer should show. Add a Custom HTML block and paste this.
<div id="rapidflare-ai-overview" style="display: flex; flex-direction: column; width: 100%;"></div>
- Add the code. In Code Snippets → Header & Footer, paste this in the Footer box. Change
promptto the topic the answer should cover, andctaUrlto your Ask page's address.
<script src="https://cloud.rapidflare.ai/storage/v1/object/public/rapidflare-embed-sdk/latest/agent.js"></script>
<script>
	// Starts only on pages that have the overview box
	if (document.querySelector('#rapidflare-ai-overview')) {
		window.rapidflare.init({
			apiKey: 'YOUR_PUBLISHABLE_API_KEY',
			prompt: 'Getting started with our products',
			display: {
				type: 'ai-overview',
				container: '#rapidflare-ai-overview',
				titleText: 'AI Overview',
				ctaText: 'Continue with AI',
				ctaUrl: 'https://YOUR-SITE.com/ask'
			}
		});
	}
</script>
- Click Save Changes, clear your cache, then open the page.
Deep dive: AI Overview, why it needs a second page, its display options and layout.
Using more than one mode
Keep one line that loads the Rapidflare script, the first <script src=...> line. Paste each mode's second <script> block below it. Each block only starts on pages that have its box, so the blocks do not get in each other's way. Do not load that first line twice.
WordPress keeps a plain div that has an id and a style, and removes scripts, so the boxes are safe in a Custom HTML block.
If something does not work
| What you see | What it usually means | What to do |
|---|---|---|
| Nothing appears | The page is cached, the code is in the wrong box, or your theme does not print the footer | Clear every cache. View the page source and search for rapidflare. Check the code is in the Footer box. |
rapidflare is in the source but nothing appears | A speed plugin is holding the code back | See Speed and caching plugins. |
| An error instead of an answer | Your domain is not on the key's allowed list | Add your live domain to the key. |
| It works on some pages only | The code is in a page block, or the page is missing its box or button | Put the code in the Footer box and check the page has its box or button. |
| A dashboard change does not show | Browsers keep the agent's settings for up to an hour | Open your site in a private window. |
Speed and caching plugins
Speed plugins can hold the code back until the visitor scrolls or clicks. If the agent only appears after you interact with the page, exclude Rapidflare from the plugin's script delay.
| Plugin | Setting that delays scripts | What to do |
|---|---|---|
| WP Rocket | Delay JavaScript execution | Add rapidflare to Excluded JavaScript Files. |
| LiteSpeed Cache | Load JS Deferred, set to Deferred or Delayed | Add rapidflare to JS Deferred / Delayed Excludes. |
| Cloudflare Rocket Loader | Rocket Loader | Add data-cfasync="false" to both <script> tags. |
Other speed plugins have a similar exclusion list. Add rapidflare to it.
Good to know
- Use WPCode, not a Custom HTML block, for the code. A block covers one page, and WordPress removes scripts from blocks for users without the
unfiltered_htmlcapability. On a multisite network, only Super Admins have it. - Do not edit your parent theme's
footer.php. A theme update removes your change. - Do not use an iframe or "embed" block. The agent does not work properly in a frame.
- Testing on a host address? For example one ending in
kinsta.cloudorwpenginepowered.com. Add that exact address to the key and remove it when you finish. - Never paste a secret key. Only a publishable key belongs in this code.
Related guides
Add Rapidflare to a Wix site
Add the chat button from Settings, Custom Code.
All website builder guides
What you need, how to choose between the chat button and the search bar, and how to check it works.
Web deployment guide
Every way to put the agent on your own pages, with the full code options.